


博文地址:http://snoopyxdy.blog.163.com/blog/static/60117440201302175419786/ ccap使用帮助:http://cnodejs.org/topic/50f90d8edf9e9fcc58a5ee0b
之前发布了ccapV0.1版本,让node可以很轻松的生产之前需要安装许多图片依赖库的验证码,由于CImg库原生只支持bmp等未压缩格式,所以体积比较大,可以说ccap模块之前还不是很完善,虽然可以安装jpeg库然后修改binding.gyp文件之后rebuild实现jpeg的验证码生产,但是还是比较麻烦。于是我就想将jpeg的库封装或者预装到ccap模块,让用户不用再麻烦的去安装第三方的jpeg库。
这里我选择jpeg库是libjpeg库,地址:http://libjpeg.sourceforge.net/ C++的图形开源库CImg地址:http://cimg.sourceforge.net/
不过很遗憾告诉windows用户,目前我还没写windows下的libjpeg库支持,所以windows用户目前还是只能使用bmp图片作为验证码,linux用户默认使用jpeg图片作为验证码的生产格式。
安装方式还是不变: npm install ccap github源代码:https://github.com/DoubleSpout/ccap
在我预装libjpeg库到ccap模块时,主要遇到了下面几个问题: 1、如何在node-gyp rebuild之前为linux系统安装libjpeg库 2、如何通过命令行安装libjpeg库 3、如何区分不同系统的编译选项,保证windows下使用bmp,linux下使用jpeg
问题1、我们来看下package.json下的scripts属性:
scripts:{
    "install" : "node-gyp rebuild"
}
在npmjs.org文档上有详细说明:
prepublish: Run BEFORE the package is published. (Also run on local npm install without any arguments.)
publish, postpublish: Run AFTER the package is published.
preinstall: Run BEFORE the package is installed
install, postinstall: Run AFTER the package is installed.
preuninstall, uninstall: Run BEFORE the package is uninstalled.
postuninstall: Run AFTER the package is uninstalled.
preupdate: Run BEFORE the package is updated with the update command.
update, postupdate: Run AFTER the package is updated with the update command.
pretest, test, posttest: Run by the npm test command.
prestop, stop, poststop: Run by the npm stop command.
prestart, start, poststart: Run by the npm start command.
prerestart, restart, postrestart: Run by the npm restart command. Note: npm restart will run the stop and start scripts if no restart script is provided.
我们可以看到scripts属性有以上这么多选项可选择,我们着重看下preinstall属性,它表示在此模块安装前运行,于是我就打算设定一个preinstall属性用来运行脚本,预安装libjpeg库。问题1我们圆满解决了。
问题2、我们在package.json文件中,加入了一行如下代码,在安装模块之前,运行js脚本,这个脚本是用来使用命令行安装libjpeg库:
  "scripts": {
    "preinstall":"node make.js",
    "install": "node-gyp rebuild"
  },
安装libjpeg库很简单,从官网wget压缩包后,tar之后,分别运行./configure和make、make install命令即可默认安装libjpeg库。于是我们通过node手册找到如下代码是运行命令的代码:
var spawn = require('child_process').spawn;
但是问题出现了,不管./configure还是make都需要进入指定目录之后运行的,通过查看帮助发现./configure 命令可以设置–srcdir=XXX绑定指定路径,而make命令通过-C XXX绑定指定路径,但是实际在我的centos虚拟机上发现设置./configure --srcdir=xxx无效,无比郁闷,仔细翻阅node手册发现spawn命令有一个相当好用的设置,cwd属性,可以设置该命令的目录,比如我们要执行ls命令,并且在/usr/local目录下执行,于是下面2段代码是等价的。
var spawn = require('child_process').spawn,
    ls    = spawn('ls', ['-lh', '/usr/local']);
等同于
var spawn = require('child_process').spawn,
 ls    = spawn('ls', ['-lh'],{cwd:"/usr/local"});
于是我们的问题迎刃而解了,只需要在执行命令的时候设置一下cwd环境变量即可,同时要注意,当没有命令参数时,也必须加上[]作为空参数传递。
问题3、由于windows下安装libjpeg和linux下流程不同,当然命令也不同,所以必须分别处理,而我目前还没有支持windows,所以我们必须分别处理windows和linux下的编译选项。 打开github的node-gyp主页,查看说明文档,我们只需要将条件和编译选项加入到binding.gyp文件即可,看代码片段如下:
"conditions": [
        ["OS==\"mac\"", {"libraries": ["-ljpeg"],
                         "cflags": ["-fexceptions","-Dcimg_display=0","-Dcimg_use_jpeg"],                                                           "cflags_cc": ["-fexceptions","-Dcimg_display=0","-Dcimg_use_jpeg"],
          }],
     ["OS==\"linux\"", {"libraries": ["-ljpeg"],
                        "cflags": ["-fexceptions","-Dcimg_display=0","-Dcimg_use_jpeg"],
                        "cflags_cc": ["-fexceptions","-Dcimg_display=0","-Dcimg_use_jpeg"]
     }],
     ["OS==\"win\"", {"libraries": [],
                      "cflags": ["-fexceptions","-Dcimg_display=0"],
                      "cflags_cc": ["-fexceptions","-Dcimg_display=0"]
    }]
]
当os为win时,我们将依赖的库libraries数组设置为空,同时去掉了CImg的编译参数"-Dcimg_use_jpeg",这样我们就顺利的让linux使用jpeg而windows使用了bmp。
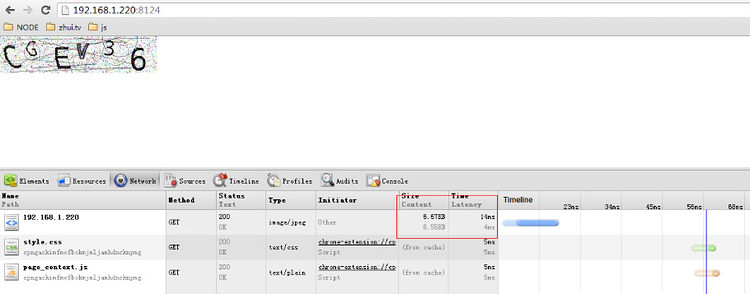
使用了jpeg的验证码彻底瘦身了,从45KB,变成了6.6KB
注意: A\以下错误是系统时间不对,或者是没有正确执行node-gyp configure
make: Entering directory `/usr/local/nodejs/node_modules/ccap/build'
make: Warning: File `../binding.gyp' has modification time 2.4e+05 s in the future
  ACTION Regenerating Makefile
gyp: binding.gyp not found (cwd: /usr/local/nodejs/node_modules/ccap/build) while trying to load binding.gyp
make: *** [Makefile] Error 1
B\如果出现以下错误,可能你的系统之前有安装过libjpeg,但是是旧版本的,只需要删除旧版,重新安装即可:
Wrong JPEG library version: library is 62, caller expects 80

删除原来libjpeg.so.62,然后执行:
ln -s /usr/local/lib/libjpeg.so.8 /usr/lib/libjpeg.so.8
C\如果出现以下错误,说明连接有误:
Error: libjpeg.so.8: cannot open shared object file: No such file or directory
手动执行如下命令即可,将lib配置文件写入即可
echo /usr/local/lib >> /etc/ld.so.conf
ldconfig
热烈欢迎各位安装使用,如果在安装过程中有任何错误和问题,真诚的希望能回帖告诉我,我会及时修复。


我npm intall ccap后,环境是mac,但没有修改bmp验证码为jpeg,我看了一下binding.gyp里面是这样的
["OS=="mac"", {
“sources": [
“addon/hcaptha.cc” ,"addon/cap.cc”],
“libraries": [],
“cflags_cc": ["-fexceptions",”-Dcimg_display=0”],
'xcode_settings’: {
'GCC_ENABLE_CPP_EXCEPTIONS’: ‘YES’
}
}],
是不是我需要把os为mac时,也修改成linux时的内容,再重新npm install ccap ?


d:\lei\work\node_modules\ccap>node "D:\Program Files (x86)\nodejs\node_modules\n
pm\bin\node-gyp-bin\\..\..\node_modules\node-gyp\bin\node-gyp.js" rebuild
在此解决方案中一次生成一个项目。若要启用并行生成,请添加“/m”开关。
  TRACKER : 错误 TRK0002: 未能执行命令: “"C:\Program Files (x86)\Microsoft Vis
ual Stud
  io 12.0\VC\bin\x86_amd64\CL.exe" @C:\Users\leizo_000\AppData\Local\Temp\tmp4d
  f312910eec453d96b58c5d0a3839f6.rsp”。存储控制块地址无效。


C:\Program Files (x86)\MSBuild\Microsoft.Cpp\v4.0\V120\Microsoft.CppCommon.targ
ets(341,5): error MSB6006: “CL.exe”已退出,代码为 2。 [d:\lei\work\node_module
s\ccap\bu
ild\hcaptha.vcxproj]


